Followers

Thursday, 15 December 2016

Kit and Clowder November 2016 class

Hi there,

As usual time is flying and too long time has passed since I last posted in here. I've practically not coloured much since my birthday in late August as I've been really busy with other things, and I do miss it. I hope 2017 will be a better colouring year for me.

Last weekend I took some badly needed ME-time and coloured up the November 2016 pencil class from Kit and Clowder. Should you ever want to learn to colour with either markers (different kinds are mentioned in class) or pencils (also different kinds are mentioned), this is definitely the place to learn. The classes contains both video instructions as well as a booklet.

Alyce Keegan - the owner of Kit and Clowder - offers feedback on ALL images to students in her classes, whether projects from class or not, in which she offer you great advice, gives tips and tricks etc.. Her facebook group is awesome, everybody are so supportive and we help each other with everything.

Well, back to my image of the Christmas mouse:


I know, I know, there's room for improvement in my colouring - and that being said, I AM a student and still very much learning. But I'm really content with my mouse and very proud of myself for having tackled this image. There are so many techniques involved, but it's not impossible for a newbie either to make just as good or even better. 

If you cannot see it, let me explain: You are looking from the outside and in through a frozen window, where you see the mouse sitting on a bauble on a Christmas Tree (the green behind him). 
When I was a child a long time ago, I remember seeing icing on the inside of a window, and if you wanted to look out you breathed on the window and then wiped the ice off when it melted. Can you see, where I'm going? 

I have coloured him with my Faber Castell Polychromos pencils, which I truly love using. 

The photo isn't the best due to the rather dark daylight up here in Denmark at the moment, so the picture is looking more blue than it is in real life. I'm sorry about that, but unfortunately there's nothing I can do about it this time of year. 

Please feel free to leave me a comment, if you like my project, and if you want to see my cards/projects on a regular basis - even though I'm still a bit unstable at the moment - please join my blog.

Be happy crafting! 


Sunday, 20 November 2016

It's been ages

Hi There!

It's been ages, since I've been in here. I'm so sorry about that. I did, however, a couple of weeks back leave a post on my other blog (see the link on the right side below my photo) if you'd like to see it.

I've been so busy adjusting to my new job, which is very different from anything I've tried before and there's been tonnes of computer programmes to learn.  I'm sent on various courses on various locations around the municipality to learn new stuff on a regular basis, so I'm really tired when I get home at night and have finished the dinner and house chores that I only have energy to surf a bit on Facebook.

I've hardly done any colouring at all. So again I have to seek the computer files for images/cards that I've not shown in here before. Please bear with me, I hope I'll have more energy some time after Christmas.

Well, I'm going to show you a card I loved making - Gosh, I can see it's already 1½ years old - but I'm sure it's not been shown before. It's an image called "Cafe" from the very talented Alicia Bel and it illustrates me in the morning before coffee except my curls are real and I don't have those cute slippers LOL.


I have coloured her with my copic markers. The sentiment is from SimplyBStamps and the sheep are from Amy Doodle Stamps. 

I put on the sheep to illustrate the she's still half asleep as I am until I get the first sip of coffee. 

I love this card, but I think I gave it up as a prize for a Bingo game in the food club last year, so one of my friends ended up with her. 

Please leave me a comment if you like my card, and if you want to see my cards/projects on a regular basis - even though I'm a bit unstable posting at the moment - please join my blog. 

Be happy crafting!


Sunday, 9 October 2016

A new Christening in the family

Hi There!

This weekend we celebrated the christening of Karen, my eldest niece and her boyfriends' 3 month old daughter.

My family stayed in a summerhouse belonging to the brother of my brother-in-law (my big sisters husband) which is located quite near their summerhouse where we often are. But on this occassion that summerhouse was the residence of the new little family and the families of their siblings, which were the christening party - does this make any sense, or is it only in my head it makes sense?

Well, anyway we were supposed to be at the church at 10.45am this morning, so we arrived a bit early to make sure we were able to get seats, so we could see the ceremony. My big sister was "the official photographer" in the church.

Karen was adorable. She was wearing a christening dress that my big sister had made for her children 34 years ago, and in which my eldest nephew and his little sister - Karens mother - wore at their christenings. Only difference was the colour of the ribbons on the dress. Blue for boy and pink/red for girl. Karens name and date of christening will be embroidered on the dress as their names and christenings dates are.

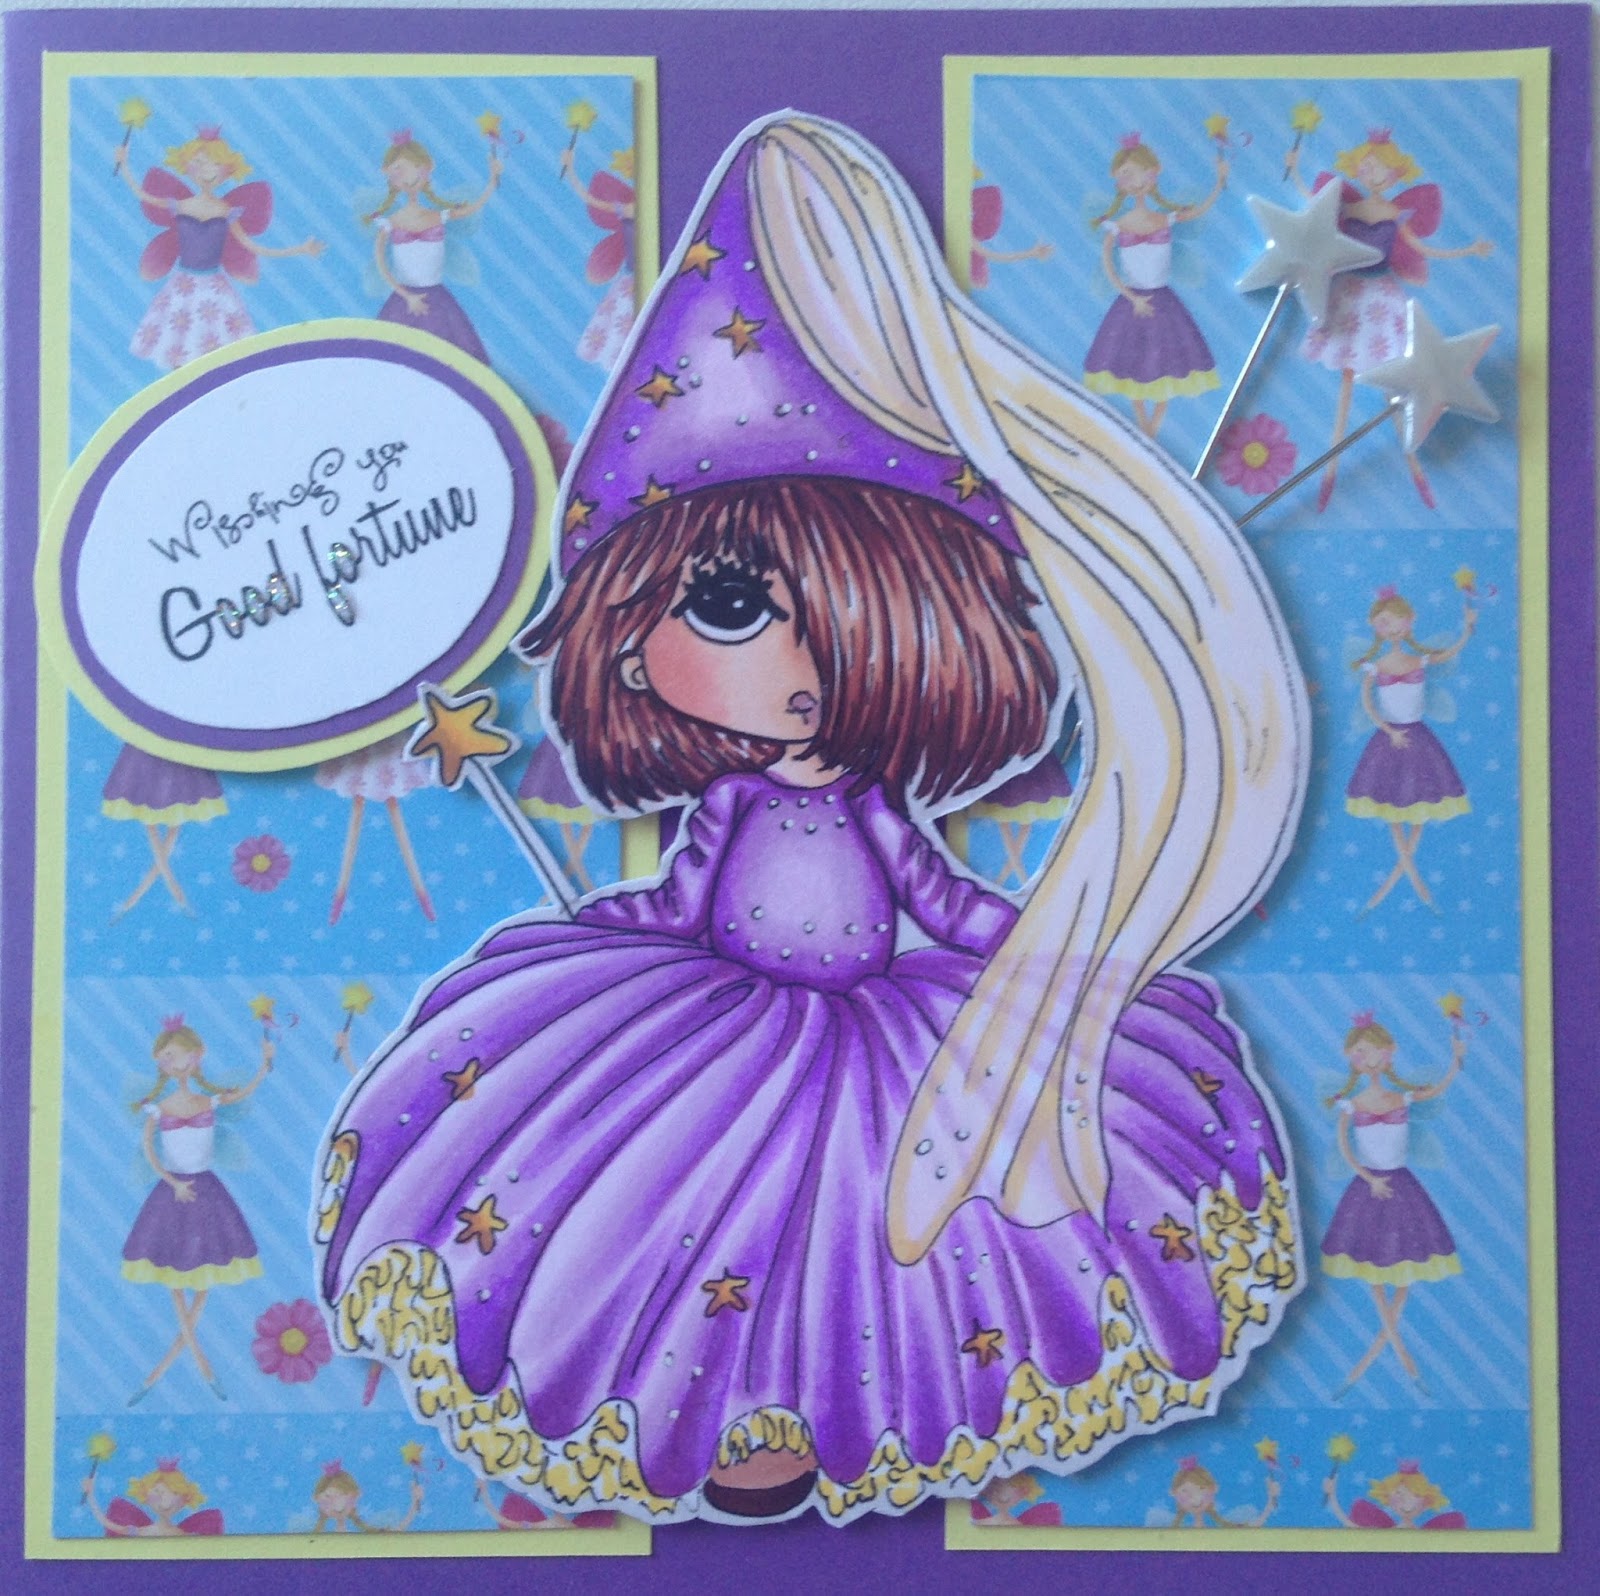
I've made this Fairy Godmother Sugi card for Karen. The image is from Lacy Sunshine, who has some awesome images and I thought this one was really suitable for the occassion, where you wish the baby all the best in life.


I put a "Wishing you good fortune" sentiment on it and a couple of wands as well. The background paper is also featuring fairies with wands, so it couldn't be more perfect.

But since I'd made special projects for my nephews two daughters, Freyja and Luna, I also wanted to do something special for Karen.

So I made this gorgeous special project for her (if I may say so myself).

I had a good look around on Google for free cliparts and stumbled across this cute baby image. It was already coloured, so all I had to do was find suitable background paper and how to make the image look the best. I think I nailed it pretty well. The image was not enough though, so I decided to make a flower arrangement on both sides of the opening. Only two of the flowers on each side are not home made, but they just looked good with the rest of the flowers.


When opening the card you can see other cliparts that I cut out. On the left side is a teddy bear. there's nothing behind the front image, as I had imagined I'd put a money note there, but I wasn't able to fasten it properly, so I left that space empty and put the note in the other card.

On the center piece, there are two pink and white bows, two bibs, then Karens name in pink gems, An image of a little princess duck sitting on a pillow, a couple of butterflies and a baby turtle. 
on the right side is a larger bib, a pair of pink socks and some baby clothes (don't know what it's called in English). 


On the back of the card I put an image of a rocking hourse. Everything on the card is of course baby pink. The sentiment says Christening, the date and the name of the church. 
The card is held together with a piece of pink ribbon tied in a bow on the front. 


I hope you like my two projects.

Please leave me a comment if you like my card, and if you want to see my cards/projects on a regular basis, please join my blog.

Be happy crafting!

Monday, 3 October 2016

18th Birthday celebration

Hi There,

This weekend I went to Copenhagen to take part in the celebration of my youngest niece and God daughter's 18th birthday. Her birthday was earlier in the week, but it was decided to celebrate it on a weekend, so as much of her family as possible could take part.

Unfortunately for her, her school changed the date for their prom (she's a senior now) to fall on Saturday, when the party was to be held, but in my family we use every opportunity to celebrate and the center of attention doesn't even have to be present. We've done that before with my eldest niece and nephew LOL.

I bought the stamp from Saturated Canary a while back (she's one of the birthday teens) and immediately had my niece in mind. It was a pleasure to to make it for her, and she was really happy to have it. Since she's saving for a drivers license, I added a money note as well to help her get it earlier.


I added the flags (which I made myself and coloured them in matching colours and put them on a yellow thread. Then I put some pearls in three corners and a Birthday sentiment (sorry, I don't recall from which company).

I hope you like her too,

Please leave me a comment if you like my card, and if you want to see my cards/projects on a regular basis, please join my blog.

Be happy crafting!

Sunday, 25 September 2016

Old project not shown before

Hi there!

I still have some old projects that I've not shown here on the blog before. And today I'm going to show you the birthday card I gave my big sister last year.

It's "Penny cover eyes" by Make It Crafty. They have so many gorgeous digi stamps, and this one is from a collection, I don't remember which one, I'm afraid.


 I used some very festive backing paper I once bought in Belgium, when I flew down for a craft exhibition where I was going to demonstrate Pergamano together with a lot of my foreign teacher friends.

My host took me shopping to this great shop where things were sooo cheap and the papers were very different from what we can get up here in Denmark, so of course I had to get some.

I don't remember anymore, what gift I got my sister, but it was supposed to be a surprise, hence the sentiment. And I thought the digi was sooo suitable for this. I bet you are also asked to put your hands over your eyes, if somebody wants to present you with a surprise.

I hope you like her, I had much fun colouring her.

Please leave me a comment if you like my card, and if you want to see my cards/projects on a regular basis, please join my blog.

Be happy crafting!